Table of Contents
 Do you also love the look of gel nails but cannot afford the costs? Well, there’s good news for you! You can achieve the same salon look at your home for just a fraction of what you pay the professionals. Gel nail polish is a liquid gel which is applied and painted on the nail in the same usual manner that normal nail polish is, but it’s easier as it’s self-leveling and you won’t leave brush strokes. After each coat of polish, nails are cured under a LED lamp for 15 seconds to 1 minute or a UV lamp for 2 or 3 minutes. If you hadn’t had done a gel manicure at home, these are the reasons why you should:-
No Strong Smell
If you were used to having acrylic paint on the nails, then you must be aware of the smell we are talking about. There are no chemical constituents in the gel nails.
Save Money
The biggest benefit of all when getting your gel nails done at home is the cost savings you will reap. By buying a Gel Nail kit for as low as $99 with a choice of any gel nail polish color you like, you would have made your money back by doing your nails at home in only two uses.
Chip Free Shine
A lot of people don’t like doing their own gel nails at home due to the fact that they may chip a lot or damages your nails. But it is not so true. When the process is done accurately following the steps discussed above, it really provides your nails with chip-free shine.
Easy Removal
If you want to save your money and a trip to the salon, you can take the gel paints off yourself easily by being a little bit extra careful. Depending on the gel, it can take 15 minutes to one hour.
Long Lasting
The best thing about gel polish is that it lasts for up to 4 weeks. If you have a bunch of events coming up to attend prom, internship interviews, and family vacations, gels are the absolute answers as they last about two full weeks with zero chipping which is indeed amazing.
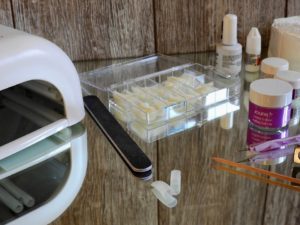
Steps to Achieve Salon Quality Nails
1. Clean your nails
It is really important that you begin with clean nails. It is not suitable to apply the gel polish on dirty nails. Cleaning of nails will involve removal of any old nail polish. Use a nail cleanser to clean your nail and decontaminate them so that gel will stick better. If you apply new polish on non-cleaned nails, you will end up with a non-uniform manicure, which will look very less attractive on your nails. You can use a nylon brush for dusting your nails.
2. Work on your Cuticles
For this step, you will need cuticle remover and cuticle pushers. You may also require warm water if your nails have hard cuticles. Soaking the cuticles in warm water for around 2 minutes will help to soften them. After softening them, apply the cuticle remover and then push back each cuticle using the cuticle pusher. To increase the adhesion of gel nail polish, it is also necessary to buff your nails after working on the cuticles. Use a good nail buffer to buff the nail surface and make it shiny and butter smooth.
3. Apply the Gel Nail Polish
There are different brands of gel nail polish you can choose from for a perfect gel manicure. The choice will depend on your taste, mood, and occasion. The application of gel polish will be done in the following three steps:-
Step 1: Apply the Gel Base Coat
Roll the polish between the thumbs of both hands to blend, without getting the polish all over your cuticles or fingers; apply the base coat to your nails. Then immediately put your hands under your nail lamp for the time indicated on the bottle of polish to cure. For some brands, the curing time will be 1 minute while other brands take up more time to dry.
Step 2: Apply the Gel Color Coat
It is advised that you should apply this in more than one thin layer, meaning one layer at a time. Doing two layers usually gives a more bold color. Choose any gel polish of any color of your choice and evenly apply it over the nails. You can use the three strips rule for perfect application. After applying the first layer, place your nails under UV-lamp to allow the gel polish to cure for the prescribed time which is generally 90 seconds to 2 minutes. Then apply another layer and cure this second coat to make the color bolder.
Step 3: Apply the Gel Top Coat
A topcoat plays a key role in making a long-lasting manicure when properly applied to the nail polish; it can last a little longer compared to when you do not apply to coat. This is because it prevents the color from chipping. Apply a very thin and even layer, and then cure for the prescribed time limit.
4. Swipe your nails with 99% Isopropyl Alcohol:
You can skip this step, but instead, your nails will be sticky and tacky. Pour a little 99% Isopropyl alcohol on to the cotton pads and swipe them over your freshly polished nails. The reason being it will make your nails dry, hard, smooth and shinier.
5. Go show off your Adorable Nails:
So congratulations. You have now acquired nice-looking and adorable gel nails which look as if done at a salon. So go and show them off.


